Host Your Own Blog With Ghost & Nginx On Linux
Self hosting your Ghost blog on Linux.
This Blog runs on the excellent Ghost blog platform.
Official website: http://ghost.org/
This is a Setup Guide/How-to, getting the Ghost Blog platform up and running on a RHEL/Oracle Linux/CentOS/Scientific Linux server.
(For other Linux flavors, minor adjustments to this guide should be expected.)
We will serve it thru a Reverse Proxy using another excellent open source application; the NGINX Web-Server/Reverse-Proxy/Load-Balancer/Http-Cache.
Prerequisites
- Linux server. (RHEL, Scientific Linux, Oracle Linux, CentOS)
- System user account with sudoers privilege or root access.
- Domain name with DNS A record pointing to the public IP of the server.
- A console or if remote, terminal and SSH.
- If you have "2." I'll presume you're comfortable with the commandline and your editor of choice. :)
Initial Installation
Let's add the blog system user/process owner and install the blog software, along with the required software dependencies.
 $ sudo yum list installed epel-release || yum -y install epel-release
 $ sudo yum -y install nodejs npm
 $ sudo useradd ghostblog
 $ sudo su - ghostblog
Above commands explained:
- Check if we have the "Extra Packages for Enterprise Linux repository" (epel-release) and if not, install it.
- Install "nodejs", "npm" and dependencies.
- Add a system user that will own the core blog files and processes.
- Switch to our new system user and environment.
Ghost blog software installation
$ curl -LO https://ghost.org/zip/ghost-latest.zip
$ unzip -uo ghost-latest.zip -d ghost && rm -f ghost-latest.zip
$ cd /home/ghostblog/ghost/
$ npm install --production
$ nohup npm start > ghost.log 2>&1 &
Above commands explained:
- Get the latest Ghost source files.
- Unzip the files into the "ghost" directory (Create it if it doesn’t exist) and remove the zip file if the previous command succeeded.
- Change into directory "/home/ghostblog/ghost/".
- Install the Ghost platform.
- Start it and detach it from current terminal. (We will construct a proper SysV-init script later for proper system and application startup/shutdown.)
The last command will generate output similar to this:
[ghostblog@gw4 ghost]$ nohup npm start > ghost.log 2>&1 &
[1] 10430
Issue the "jobs" command to check that we are up and running.
$ jobs
Above command explained:
- List running and suspended jobs in the current bash environment.
Output:
[1]+ Running nohup npm start > ghost.log 2>&1 &
[ghostblog@gw4 ghost]$
Ghost configuration
Configure "/home/ghostblog/ghost/config.js"
$ vi /home/ghostblog/ghost/config.js
Change "url:" to your domain:
// When running Ghost in the wild, use the production environment
// Configure your URL and mail settings here
production: {
    url: 'http://example.com', // #<--- Your domain here
And here:
    // ### Development **(default)**
development: {
    // The url to use when providing links to the site, E.g. in RSS and email.
    // Change this to your Ghost blogs published URL.
    url: 'http://example.com', // #<--- Your domain here
Restart Ghost into production environment:
$ pkill -u ghostblog -f 'node index'
$ NODE_ENV=production nohup npm start > ghost.log 2>&1 &
Above commands explained:
- Kill process owned by "ghostblog" matching "node index"
- Start Ghost in prodution environment, background and detach from terminal.
Nginx Installation
Installation and Configuration of Nginx as a reverse proxy, to the Ghost Blog locally running instance.
$ exit
$ sudo yum list installed nginx || yum -y install nginx
$ sudo /etc/init.d/nginx start || chkconfig nginx on
$ sudo vi /etc/nginx/nginx.conf
Example nginx.conf file
user  nginx;
worker_processes  2;
error_log  /var/log/nginx/error.log warn;
pid        /var/run/nginx.pid;

events {
    worker_connections  1024;
}

http {
    include       /etc/nginx/mime.types;
    default_type  application/octet-stream;

    log_format  main  '$remote_addr - $remote_user [$time_local] "$request" '
                      '$status $body_bytes_sent "$http_referer" '
                      '"$http_user_agent" "$http_x_forwarded_for"';

    access_log off;
    sendfile        on;
    keepalive_timeout  65;

    include /etc/nginx/conf.d/*.conf;
}
Creating the Ghost Blog Nginx configuration file
$ sudo vi /etc/nginx/conf.d/ghostblog.conf
Add the following and change to your domain and ip address marked with "#<---"
# Reverse proxy server
upstream ghost  {
    server 127.0.0.1:2368;
}

server {

       listen       80;
       server_name  example.com www.example.com; #<--- Your domain goes here.

       ## send all traffic to the back-end
       location / {
            proxy_pass        http://ghost;
            proxy_set_header Host      $host;
            proxy_set_header X-Real-IP $remote_addr;
            proxy_redirect    off;
            proxy_hide_header X-Powered-By;

            location ~* \.(html?|css|jpg|gif|ico|js|woff)$ {
                    proxy_cache_path /tmp/cache levels=1:2 keys_zone=cache:60m max_size=1G;
                    proxy_cache          cache;
                    proxy_cache_key      $host$uri$is_args$args;
                    proxy_cache_valid    200 301 302 30m;
                    proxy_cache_valid    404 1m;
                    expires              30m;
                    ### proxy-buffers ###
                    proxy_buffering         on; # Has to be on for cache to work
                    proxy_buffer_size       8k;
                    proxy_buffers           256 8k;
                    proxy_busy_buffers_size    64k; proxy_temp_file_write_size 64k;
                    proxy_pass  http://ghost;
            }

            # Temporary access control below until we have set up an owner/admin for the Ghost Blog.
            allow 127.0.0.1; # <--- Your public server ip address goes here.
            deny    all;
       }
}
Test Nginx Configuration and Reload
$ sudo nginx -t && /etc/init.d/nginx reload
Above command explained:
- Test nginx configuration and reload if ok.
Output:
nginx: the configuration file /etc/nginx/nginx.conf syntax is ok
nginx: configuration file /etc/nginx/nginx.conf test is successful
Reloading nginx:
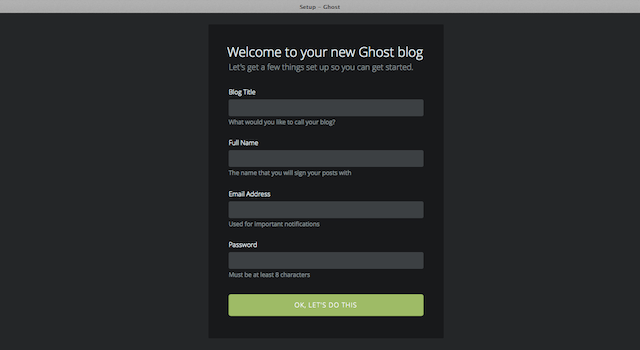
Creating the Blog Owner (You!)
Start your favorite browser and connect to your new blog on:
http://example.com/ghost/ #<-- Substitute for your own domain.
Output: (Hopefully! ;)
Removing the access restriction.
Once you are ready to let the world read your blog, you will have to edit the "/etc/nginx/nginx.conf" once more.
$ sudo vi /etc/nginx/conf.d/ghostblog.conf
Find this part again:
# Get your ip address from Google: Search for "my ip"
 allow 127.0.0.1; #<--- Your ip address from above search goes here.
 deny    all;
Change it to:
# Get your ip address from Google: Search for "my ip"
# allow 127.0.0.1; #<--- Your ip address from above search goes here.
# deny    all;
Test and reload the Nginx configuration:
$ sudo nginx -t && /etc/init.d/nginx reload
Above command explained:
- Test nginx configuration and reload if OK.
Your blog is ready and world readable.
Next: Installing a Ghost Blog Sys-V init Linux Startup Script
Hope you enjoyed it!
Lars Bjaerris